If you’ve been eyeing that sturdy, timeless look of natural cleft bluestone steps for your entryway, backyard path, or small porch, you’ve probably asked yourself one question more than any other: Can I install them myself? As a supplier who’s worked with homeowners, handymen, and contractors for over a decade, I’ve heard this question dozens of times—and the short answer is: It depends. It’s not a yes or no call; it hinges on your DIY experience level, the size and scope of your project, and how much you’re willing to invest in time, tools, and research. In this post, I’ll break down everything you need to know to decide if a DIY bluestone step install is right for you, from the prep work that makes or breaks a project to the pitfalls even eager beginners often miss. Natural Cleft Bluestone Steps
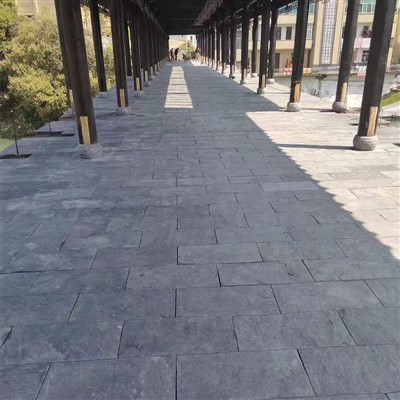
First, let’s start with what makes natural cleft bluestone steps different from other hardscaping materials. Unlike poured concrete or pre-fabricated plastic steps, each bluestone step is a unique piece of real rock, quarried from large deposits and split along natural fissures to create that uneven, textured face people love. No two steps are exactly the same—some might have a slight lip on one edge, others a tiny indent, and that’s part of their charm. But that uniqueness also means installing them isn’t as straightforward as laying flat paving stones. You can’t just dig a hole and set them down; natural bluestone steps need a solid, level base that won’t shift over time.
For small projects—like a single 12-inch step up to a small porch from a walkway—DIY is absolutely doable. I’ve seen homeowners with basic DIY skills pull this off successfully, especially if they take their time and don’t cut corners. But before you grab a shovel, let’s talk about the work that goes into a DIY install, because it’s not just laying the stones. The first and most critical step is the base preparation. Bluestone steps are heavy—even a small 12×24 inch step can weigh 80 to 100 pounds, and a full 3-foot wide step can easily hit 200 pounds. If the base isn’t compacted correctly, the steps will sink, crack, or become uneven within a year or two.
What does that prep work look like? You’ll need to excavate the area where the steps will sit, making sure to account for the total rise and run of your steps. The total rise is the vertical height you need to cover—for example, if you’re going from ground level to a porch 18 inches high, that’s three 6-inch steps. The run is the horizontal depth each step occupies; the minimum code-compliant run for outdoor steps is 11 inches, so three steps would need at least 33 inches of horizontal space. Excavating means digging out not just the area of the steps themselves, but also the area of the base below them. A general rule of thumb is to dig 6 to 8 inches deep for the base: 4 inches of compacted gravel, 2 inches of sand, and then the steps set in mortar. Wait, mortar—another thing many DIY homeowners underestimate. You can’t set natural bluestone steps on just gravel; they need a stable mortar bed to prevent shifting. Mortar mix for stone steps is different from wall mortar, too; it needs to be flexible enough to handle a bit of ground movement, but strong enough to hold 200+ pound stones. Mixing it correctly takes practice, and if it’s too wet or too dry, the steps will crack or come loose over time.
Then there’s the fitting part, which is where natural cleft bluestone’s unique nature becomes both a pro and a con. Because no two steps are the same, you can’t just line them up like puzzle pieces from a kit. Even if you order steps of the same nominal size, one might be a quarter of an inch shorter than the other, or have a slightly uneven edge. You’ll need to level each step individually, which means using shims (usually small pieces of stone or plastic) to adjust height while the mortar is still wet. For a single small step, that’s manageable; for a full flight of 5 or 6 steps, that can add hours of work. Many first-time DIYers skip this step, or do it too quickly, and end up with a wobbly set of steps that creak when you walk on them—or worse, crack when pressure is applied.
Now, let’s talk about when DIY isn’t a good idea. If you’re tackling a flight of 4 or more steps, especially on a slope, I’d strongly recommend hiring a professional. Here’s why: first, the physical labor. Moving 200-pound bluestone steps is hard on your back, and one wrong lift can lead to a serious injury. Second, code compliance. Most cities and towns have building codes for outdoor steps that dictate things like minimum height per step, maximum total rise, and slip resistance. A professional knows how to check local codes, and they’ll make sure your steps are up to safety standards—something a lot of DIY beginners overlook. Third, drainage. Bluestone is a natural stone, so it’s porous, but the steps themselves need to be sloped slightly away from your home or foundation to prevent water from pooling under them. A pro will factor that slope into the base prep, so you don’t end up with water seeping into your basement or causing the base to erode over winter. I’ve had to repair dozens of DIY-installed bluestone steps that had poor drainage, leading to cracked stones and shifted bases, so this isn’t something to take lightly.
I also want to be honest about the mistakes I’ve seen homeowners make when trying this project alone. One common mistake is not compacting the gravel base enough. If you skip the plate compactor (renting one usually costs $50 to $100 a day) and just pack the gravel with a shovel, it will settle unevenly. That leads to steps that dip in the middle or on one side within 12 months. Another mistake is using the wrong mortar. Some DIYers grab a general-purpose bag of mortar from the hardware store, which is too rigid for outdoor hardscaping. Over time, that rigid mortar can crack when the ground freezes and thaws, and the steps will come loose. Then there’s cutting the steps. Natural bluestone steps are heavy, and cutting them requires a wet saw with a diamond blade—renting that tool adds more cost, and if you don’t know how to use it, you can damage the stone or hurt yourself. I’ve had customers bring in half-cut bluestone steps they ruined trying to trim them to fit their space, which is an easy mistake when you’re new to power tools like that.
That said, if you’re still set on DIY, there are ways to set yourself up for success. First, start small. Don’t take on a full flight of steps your first time—try a single step for a small garden path or a low entryway. Do your research: there are dozens of free, detailed tutorials from hardscaping experts on YouTube and home improvement websites that walk you through every step, from excavating to mixing mortar. Invest in the right tools, too: don’t skip the plate compactor, and make sure you have a level, a rubber mallet (to tap the steps into place without cracking them), and a trowel for mortar. And when you order your bluestone steps, work with a supplier who knows the material. At our company, we always include a detailed installation guide with every order, and we’re available to answer questions if a homeowner gets stuck mid-project—something I’ve heard many big box stores don’t offer. A lot of DIYers reach out to us a few weeks into their install, panicking because they can’t get a step to level, and we walk them through the fix step by step.
Another tip for DIYers: order a few extra steps. Because natural bluestone has unique characteristics, having one or two extra allows you to pick the most consistent-looking stones for the main flight, and use any slightly uneven ones for the top or bottom step, where small imperfections are less noticeable. This saves you from having to rush and fit a step that doesn’t quite work, which is a common source of frustration for first-timers.
At the end of the day, the decision comes down to three things: your skill level, the size of your project, and your budget. A small, single step is totally manageable for a DIYer with a basic set of tools and a willingness to learn. A full flight of steps on a slope? It’s probably worth the investment to hire a professional, both for safety and for long-term durability. I’ve seen DIY steps that last 20 years, and I’ve seen DIY steps fall apart in three, all depending on how much care went into the base prep and fitting.

As a natural cleft bluestone steps supplier, I want you to make the choice that works for you. If you’re ready to move forward with your project, whether DIY or professional, we can help you select the right steps for your space, answer questions about materials and specs, and make sure you get authentic, high-quality natural bluestone that will stand the test of time. To discuss your project in more detail, we’re here to help with any questions, recommendations, or to coordinate a delivery that fits your timeline.
Billiard Table References
- National Association of Home Builders. (2021). “Outdoor Hardscaping: Best Practices for Step Installation.” NAHB Research Center.
- Natural Stone Institute. (2022). “Installation Guidelines for Natural Bluestone and Slate Hardscaping.” Natural Stone Institute.
- U.S. Department of Housing and Urban Development. (2020). “Residential Building Codes for Outdoor Stairs and Landings.” HUD Office of Community Planning and Development.
- HomeAdvisor. (2023). “DIY vs. Professional Hardscaping: Cost, Time, and Longevity Comparison.” HomeAdvisor Inc.
- Quarry Materials Association. (2021). “Properties and Care of Natural Cleft Bluestone for Hardscaping.” Quarry Materials Association.
Yushan Hengshuo Mining Co., Ltd.
Address: No. 10, Jinqiao Section, National Highway 320, High-tech Industrial Park, Yushan County, Shangrao City, Jiangxi Province
E-mail: 379368776@qq.com
WebSite: https://www.hengshuoslate.com/
